Landscape design – first thoughts

When you bulldoze you get given a clean slate for the garden. Pity, because I liked my established garden. Then again, I get to start again and build the dream garden. So it is not all bad.

The established trees we were allowed to keep include:

  • Three avocado trees which are now into their third year of bearing fruit
  • Fruiting kiwifruit vine (one male and two females)
  • Two large olive trees
  • Loquat tree (fruiting)
  • Mulberry
  • Fig
  • Cherry tree

My garden was – and will be – 100% edible. That is, every plant must be able to be cooked or have a key use in the garden. Bamboo passes the test as it can be used to make bean and tomato stakes. Marigold flowers are an important part of the ecosystem so they also pass the test

I have around 50 fruit trees and herb trees with me in the rental that need to find a new home. I’ve also got another 20 fruit trees hiding on the non build part of our block

We’ve been advised that we need to pave around our home as a water barrier to keep any rain off the slab. Our block can get quite wet during rain. The paving has started the landscaping discussion.

Step one has been to write down the requirements.

  • Outdoor room decking wrap around to the rear
  • Water feature wall off the deck at rear (centre)
  • Citrus grove at front of property for privacy
  • Paving around the side (water barrier)
  • Extensive raised vegetable beds and herb beds
  • Permanent asparagus
  • Berry house (fully enclosed so the birds don’t get in )
  • Small green house
  • Lawn area/ clover lawn areas at front and rear
  • The dining room outlook should be very. feature driven. I’m not sure whether that is overlooking vegetable beds,arden beds.
  • The garden that supports the kitchen window outlook (south side and very tricky!)
  • Bin position is another consideration
  • Side fence for outdoor room development
  • Paving to front door

I’ve started to collect images of what I love in the hope that a basic design will leap out at me.  I’ll start shortlisting a few suppliers over the coming months. I’ve seen some great local work around our street so I’ll also do some door knocking as well.

Lovely feel and colours.

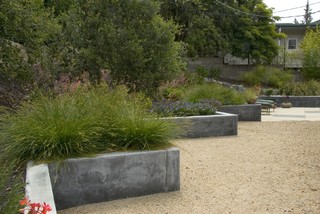
Gravel and retaining wall. Imagine this with herbs and tomatoes in it!

I love straight lines of things. I love the order and repetition. Hopefully there will be some linear elements in my garden.

A great water feature idea that would look great in front of my kiwi fruit vine

If they cut into my block any more I might be forced into this!

Got a question you want to ask without posting? Feel free to email us at metriconblog(at)internode.on.net 

Day 51 – Site visit

Small drama yesterday. Our 70 year old water meter decided to explode spilling a million gigalitres onto our site (made up bit: I really have no idea how much came out!)

Thankfully the water utility company was out in a flash. No damage but a soggy site around the side.

Today we had another official site visit. This time, it was to actually walk the rooms and get a feel for the house.

The house sits wonderfully on the block. There is a great sense of space out the front, rear and side.Very happy with the orientation. We spent a lot of time maximising our block and choosing the right configuration.

The gutters and fascias are being put on this week. Roof next week. Bricks have been ordered and will start in a week and a half.

All the windows look great. I love the surfmist colour.

Downstairs flows really well. But we already knew it would. We walked the display home for ages. It does feel quite different on your block on your soil.

The views from the windows were interesting. My established garden at the back will be a wonderful backdrop to the rear sliding doors.

It was also the first time we had been upstairs. I was very excited climbing the ladder in anticipation of what I’d see. Upstairs is massive! I was really surprised how spacious it feels. The views around us are actually quite nice and leafy.

We have a few double stories in our street so we don’t look too out of place. We have a nice view down the street as well.

The parent’s retreat is so large I think we may end up sub-letting it.

And guess what, we have sea glimpses! Chardy on the balcony watching a matchstick thick blue line of the sea. Hey, better than nothing. I’ll take it!

No pictures of the view as it was too overcast.

IMG_1243

IMG_1248

IMG_1261IMG_1241

IMG_1242

Day 44 – Roof trusses and windows

A nice surprise today when we drove past; we have windows!  Not sure they’ll keep the cold out very well just yet, but they do start to hint at the house within!

Also great to see such a lot of work done on our pesky roof style.  It is not a standard gable roof that most people build. Instead, we have gone for a skillion roof.  A skillion roof is a bit of a rare item around the suburbs. The Metricon Salamanca – with a skillion roof has never been built in Victoria before! How exciting. We hope the boys keep the engineer’s drawings close at hand. A skillion roof basically is a roof that is not a standard triangle roof but a sloping roof surface often not attached to another roof surface.  It can also affectionately known as a shed roof.  

IMAG0713

Windows to the front office and side lounge room and dining room.

IMAG0723

Day 41 – Upper Frames

The lads cracked on today like a team possessed. We have a big storm due later in the week and I think everyone is making hay. The base frames for the upper was done in a single day. Thank you to the crane that made light work of the frames.

The house suddenly has a size, and  presence and is larger than life.  But you know what, if I wasn’t excited before,  I am now.

photo 4

For Sale: Entire house up on ebay!

I love ebay. Really, I do. So much goodness in one site. I listed around 30 items and sold 29. The skirtings didn’t sell.

I decided to have all the items sell at once and then spend an entire weekend on site managing all the tradies coming and ripping things out. Every item required removal by the purchaser.

No one seemed to care; in fact, most blokes rocked up with a ute, a mate , and some fine tools. It was actually quite fun – looking back on it.

I’d suggest you do the pictures and descriptions in a word doc first. Then you just cut n paste them into ebay. Make sure you specify pick up times.

You’d be shocked at what people will buy.

I sold my:

  • Sink
  • Kitchen cupboards
  • Doors
  • Bedroom cupboards
  • Laundry trough
  • lights
  • Floors
  • Windows
  • sliding doors
  • tiles
  • power points
  • skirtings (didn’t sell)
  • oven
  • dishwasher
  • cupboards
  • robes
  • vanity
  • mirrors
  • Front door
  • Side door
  • Back door
  • Trees/shrubs

Prices:

  • Doors ($20)
  • Sliding door ($500)
  • Ducted heating with vents ($600)
  • Stove ($450)
  • Entire kitchen ($500)
  • Bifold doors ($1300)
  • Blue stones ($150)
  • Lights ($50)
  • Swing door ($50)

I was also told that I could have sold the bricks, roof tiles and much more. So, don’t be shy, put it all on ebay.

Plants are another thing; they tend to sell as well. Oh, and even the front fence has some value to some person out there.

Tips for ebay

  • You don’t know what someone wants out of your item, so list all the details you can, including multiple images
  •  The amount of times a buyer told me they would have paid more but they couldn’t see the condition underneath, or the back, the screws, the hooks etc…
  • You will get hundreds of questions, be prepared to measure everything, and be prepared to have to go and measure some odd parts of things, diagonal width, and width of glass piece of door.
  • In your answer to buyers, remind them of the auction end date. So many of my willing buyers actually emailed me to apologise for missing the auction because they forgot. Don’t let them forget.
  • Be really clear about the pick up day and times
  • Lots of unsolicited offers will come along offering you very low buy it now prices. They’ll also tell you that their offer is best and that the item won’t sell. Delete these messages.
  • You really want everyone on your site on the same weekend window, otherwise you’ll go mad.
  • I always go 10 day auctions to get the page views right up.
  • Try and have electricity   to the property as it makes it easier to remove items (I didn’t and some tradies found it really hard to cut n dice the bits out)
  • Try and work sequentially through the house – once the front door has sold you house is no longer secure – so sell the internal items first.
  • Go for it. You’ll make a bundle of cash you can use towards the demolition.

I know one family that 100% covered the demolition cost with their period home items. That is nice work indeed. Did you ebay your house?

2013-07-07 10.12.14

2013-07-07 12.33.34

House Demolition – Hints and Tips

The demolition process is really complex. It was making me a bit nervous. Our old house had a fair bit of asbestos and I have heard that if the clean up isn’t done very carefully, you can be stung with some nasty clean up bills. It is also a very sad day. This was our home of 8 years. A home we loved and a home where we created our family. I really loved our old house as well. It was a cute old girl. I thought I’d be sadder on demolition day, but after weeks and weeks of salvage work on her (back breaking work!) I was actually quite over the entire thing – and keen for the next adventure.

scrape

Firstly, you need to get an asset protection permit from your local council. You’ll then pay a deposit promising you will not hurt any of the nature strip etc.

You then need to choose a demolition company. Metricon recommended 3 companies. One company wasn’t interested in the job, one didn’t get back to me, and one was a little too expensive.

We actually chose a Metricon blogger favourite in Jim. He was a treat. What a great demolition.  He was even so gentle not one fruit tree got hurt. Thanks Jim.

2013-07-23 17.27.26

Once I gave the green light the job actually happened within a few days. Demolition quotes seem to be in the $11,000 – $15,000 range. Asbestos clean and sewer capping included.

I recently heard of a Metricon demolition job by a company that buried all the rubble in the old swimming pool. Great. So the owner paid for a new company to come in and remove the rubble and many thousands and has had their build delayed around 60 days, and counting.

Metricon inspect your block after the demolition and I’m told some sites are put in the red bucket – do not go past go. You do not want to be that person.

Metricon inspectors also dig little holes in the soil to ensure the rubble hasn’t been buried. They are not stupid – they are on to the oldest trick in the book. Tipping fees are the biggest cost of your demolition so it makes some sense that there is a dodgy element that take this short cut – dumping and burying it on your block.

A warning on some demolition companies – some have a clause in the contract that they own the property fixtures and fittings once you sign with them. That is, you are not allowed to salvage any of your own items. That seems a bit dull to me.

I salvaged around 1/3 of the demolition cost selling every single thing I could think of in my house on ebay. It was the ebay marathon weekend!   Do not sign with these companies. Do your own salvage and be your own master!

You also need to organise a temp fencing option as soon as the demolition is complete. The temp fencing guys were on site the very next day to lock up our property.

TIP

  • Go with a reputable company – and speak to happy clients
  • Confirm what the demolition company is giving you
  • Are there hidden fees if they find tree roots (one company had a $750 surcharge!)
  • Are they doing a site clean where they go through the rubble removing the larger rocks via a large sieve?
  • What about sewer capping? Not included, this can be an additional $1200 – $2000
  • Will they do the council permit for you (far quicker)?
  • Will the give you a certificate of site inspection?
  • Will they manage the asbestos clean?

How did you find the demolition process? Were you sad when the old girl was knocked down?

2013-07-20 08.41.072013-07-23 17.25.08

Day 35 – Ground Floor Frames

Frames were dropped off Thursday night. Rained Friday. Framing teams started today.

It was the first day we have been back on home soil for many months. Most of the viewing has been from behind the fence. Very exciting to walk the property with the house in mind. Funny, the old house seems to be fading from my mind.  

In a day they’ve done a fair bit. I can see all the rooms now. Frames. What a wonderful thing. They come completely prefabricated with numbers on them. Then the teams just bolt them into place. They did most of the ground floor in a day.

It was great to see the rooms and get a feel for the Salamanca. It has been almost a year since we walked it. I was pleased to see the floor plan really suits our block. The window holes looked grand and well situated (we changes a lot of them).

The fireplace gap in the wall will probably have the builder shaking his head for a bit longer – not a standard item- and the odd shaped feature roof will probably cause a few considered moments coming up.

 But all in all the slab looks a beauty.

The outdoor room meets my garden nicely. A good distance from the rear. The cut in has also hinted at a future raised garden bed – wonderful.  

We had our first official meet n greet with our site manager. He’s great. He’s got a few jobs to finalise before x-mas, so I’ll try and keep out of his way until then.  

It is fascinating how your house seems to grow and shrink with each stage. At the slab stage, the house seemed large and ready to each up everything around it. Now with some frames, the house has found some sensible proportion. I’m sure it will tower over us soon enough.

Next official visit will be a walk of the first storey!  Can’t wait. And will I be able to see the sea? Hope so! 

Image

Image

Colour selections with Metricon – Studio M

Studio M is your grand final day. This is the tough, hard slog where you choose absolutely everything you will put into your new house. This appointment is one that most people fear – and stress about – and with good reason.  It is a marathon day, no matter how well prepared you are.

We took around 3 hours and we were super prepared. I have heard of 8 hour sessions.

So what is excluded from studio M selection day?

  • Electricals (separate appointment)
  • Cabinetry and colours (separate appointment)
  • Tiles (separate appointment)

The day is a dazzling day of add ons and extras, many of which we hadn’t really considered. It is possible to add $20,000-$30,000 in extras at you Studio M appointment as you learn about all the wonderful things a house can contain!

Even on a tight budget we added in some extra luxuries like a bath for the ensuite, upgraded basin in ensuite, added floor to ceiling tiling, upgraded door quality, a nicer front door and lock. Pretty modest.

The first tip has to be that you are allowed to visit Studio M as many times as you like prior to your appointment. We made four visits so that we knew what the choices were. It is very exciting to get a feel for standard versus other.  Many of the standard fixtures are really good.

There is a consultant available a studio m but they are not really there to choose your colours for you. They are really guiding you though the selections. They can show you what others have chosen, or what is common, but they are not really there to bring your ideas to life.

Now that we’ve cleared that up, here is what you will need to choose:

  • Bricks
  • Mortar colour
  • Type of joins
  • Roof colour/ tile colour/ style
  • Gutter colour
  • Facia colour
  • Downpipes colour
  • Windows colour and model
  • Front garage door (colour and style)
  • Front door type (height, entrance set and lock, colour)
  • Colour of portico, meter box, cladding, balustrade, capping
  • Internal door handles
  • Sliding doors (types)
  • Door stops
  • Architraves, skirting (style and colour)
  • Cornice (types and colour)
  • Robes (types and features)
  • Internal doors
  • Internal wall colours
  • Ceiling colours
  • Tapware
  • Basins (bathrooms, laundry, etc)
  • Handles (for everything)
  • Toilets
  • Baths/shower screens
  • Bathroom accessories (heatlamps)
  • Tiling options (floor to ceiling/ other)
  • Mirror selections (tiling around mirrors?)
  • Staircase features (post, handrail, treads, risers) colour and feature options
  • Flooring (tiles, carpet, woods)
  • Blind options

The base or standard fixtures we thought were very reasonable and suited us included:

  • Base toilets
  • Standard showers
  • Standard tapware
  • Standard basins (well, one upgrade!)
  • Standard handles
  • Standard Laundry trough
  • Standard sink

The tricky thing is that changes or selections you make at tiles and cabinetry appointments later can have a massive impact on the Studio M selections, or vice versa.

If you choose crazy cabinet colours, will it go with the floors or paint colours? Or what about those red tiles?  Here is where the process can get a bit disjointed.

I’d strongly recommend you choose your tiles and flooring preferences – or a keen eye for what you think you’ll select – and bring those selections to all other appointments.

Then the cabinet team can understand the base colours they are dealing with and the studio M team can help build the picture.  If you do the tile appointment last – with no feel for what is available – you may be pushed into some more expensive tile colour selections to match the rest of your colour scheme. There is no perfect order here. All you can do is keep every different team on the same page with what you have chosen – or intend to choose.

And you can make unlimited changes, so no worries if you don’t get it all perfect on day one.

You can see our studio M colours here: https://metriconadventure.wordpress.com/fixtures-and-fittings/

How did you go at selections? Any tips? Did you find it overwhelming? Any regrets?

So many choices. Walls and walls of stuff. Choose wisely!

2013-02-09 15.14.332013-02-09 15.23.162013-02-09 15.23.092013-02-09 15.23.122013-02-09 15.08.562013-03-20 09.59.07

Building process with Metricon

The building process with Metricon is similar to other builders but I thought it was worth going through the process from day one.

We started off visiting a number of Metricon display homes. We found a few houses we really liked the look of. We then called the sales office to get a basic price as this information is not immediately available. We ended up getting a quote on two that were not quite right. We then narrowed down on our two choices – the Addison and Salamanca.

Even after getting base price quotes on these, we still went through every other house on the Metricon website probably about 10 times to confirm and double check we had the right house for us. (Confession time: even well into the preliminary contract phase we were still toying with other layouts just in case we’d missed something. I think this – while a tad paranoid, is probably something a few clients do!)

When you find a floorplan online you really like, check to see whether you can find that floorplan at a display home. if not, find one that is similar.  We found a similar house to the one we wanted – Liberty – was a very good walk through to start with (slightly larger, but we got the gist).

We then made the trip out to the Salamanca proper (opposite end of the earth to us!) It was built to the opposite orientation to ours – which threw us a bit, but at least we got to walk the dimensions and feel the areas we loved, and quickly identify the areas that would be a challenge (laundry is modest, not large)

Most sales people will offer to accompany you through the home, pointing out the features and the upgrade items. Pretty much everything you see is a generous upgrade – sometimes items you can’t actually purchase via Metricon.

I know people get caught up in the moment with the amazing display homes, but we were only looking at the room sizes. We took a tape measure and started to really live and breathe the layouts.

The first step is the $1000 deposit.  This gives you a sales contract (non legally binding) with indicative site fees, a range of your upgrade items that you already know about from reading blogs like this, other blogs, and walk through of display homes.  You also get to see some indicative floor plans and some very illustrative site drawings of where your house will sit on the block

This deposit also locks you into the current promotion. So if one is ending and another about to start, it may be worth trying to suss out the best one for your circumstances.

After initial deposit, Metricon will do a site survey and soil test.

From the deposit date you have 180 days to make the contract unconditional – this includes getting everything in order so you can sign the final contract.  This includes chopping any trees, demolishing your house, proof of finance, house title is in order etc.

We made it with 10 days to spare. There is a lot to do between sales and final contract.

At your preliminary contract appointment you’re presented with siting diagrams and initial floor plans.  It also includes many of the upgrades that you’ve made along the way whilst thinking about the house.  When you’re happy with your prelim contract, cough up another $3000 to get the final contract drawn up.

Before the final contract you have all of your Studio M colour selections, electrical and tile appointments.  So any prices in the contract so far are only indicative and do not include all the good stuff coming up.

Final contract is d-day. Here is where you sign away your life. You are warned that no more changes are allowable. Let me be clear. You can still make fixture and fitting and colour change, but nothing major to the structure.  I have heard about minor structural changes after this point without penalty, but it really is at Metricon’s discretion.

The financial creep from preliminary contract to final contract can be quite a lot so be warned. Our creep was $50,000 until we took a knife to the extras to try and keep it on budget. We ended up around $25,000 above preliminary contract price with the new things we chose along the way.

You have to sign every single page so take your time. It takes a while – maybe upwards of 2 hours.   Here is where you cough up a 5 per cent deposit (less monies already paid).

Oven the coming weeks you then get copies of every selection for one last double check. We found one small error on the builder’s plans that was quickly rectified. So I repeat – sit down, concentrate, and tick off every single thing even if you have looked a million times. Ours was a new error that crept in.

These form the basis of the builder’s plans and the ordering of your supplies.  Metricon then apply for your building permit, and have 30 days to start construction from the date the building permit is approved.

Our timeline was:

  • Sales contract (November)
  • Preliminary contract (February)
  • Final contract (May)
    • (rental house late May)
    • (demolish July)
    • Build start date (October)

The entire process take a lot longer than you may imagine. I’ve seen some people run from sales to build start inside six months, but we were closer to 11 months.

How long did you take from sales sign up to build start date?
My kitchen rules!

The hub our house and the love of our world. We decided to spare no expense on the kitchen. Sure it might be laminates everywhere else in the house but the kitchen is the focal point.    

kitchen sketch

We’ve gone for a large island bench. It is 1380 wide, 2450 long and 60mm chunky stone. We’ve added a big deep storage cupboard to the island bench to hide all the living room junk! The kitchen has a nice overhang on two sides for lots of stools and island bench dinner parties.  We added a shelf to the island bench to break it up a a bit as it is a very imposing structure. It just softens it a bit.

We have pushed the bench out into the living and dining area a bit to give the bench some room for foot traffic.

The kitchen bench will feature three glass pendant lights, of which we are still finalising.

We moved the sink from the island to make it a more usable space. That means the sink, stove, dishwasher are all in a row.  Not the dream kitchen triangle of fridge, sink and stove. Time will tell.

We’ve gone a glass window splashback. It turns out this option is cheaper than tiling or a glass splashback. Good news because we think these windows to the garden are sensational. Hard to keep clean, but how good do they look.  Off white tiles adorn the sides of the sink and stove area.

The overhead cupboards are just a long row of off white. We’ve integrated the range hood as well. We’ve added a bulkhead above the cupboards so they don’t just stop and hang in mid air.

We’ve gone for oversized drawers where possible as the standard ones are just annoying. I’m a drawer stuffer sort of person, so I like to toss and never have another drawer jam ever again!

The walk in pantry is massive so that will be the main storage larder area. It will also house all appliances ready-to-go on a workbench on one side and shelves on the other.  I like storing sacks of coffee beans, grains, olives, preserves, so a large pantry was a must.

We have gone with twin 60cm electric ovens. We looked at a big monster oven, but we’ve had one of those before and only used it to full capacity a few times. The new trend seems to be two ovens for maximum usefulness. I like this trend. I like the functionality of dual cooking.

We’ve also upgraded the exhaust fan range hood to a super monster unit that will ensure our house doesn’t smell like a kitchen. We went the maximum litres of circulation we could afford. It also sends the air outside, rather than into the roof cavity.

We’ve gone an integrated dishwasher because it was not much more.

I purchased all appliances through Metricon. Of the four appliances, only one could be found $80 cheaper – a clearance model from a deep discount online retailer.  Metricon also manages the install as well. Well worth it. I’m not sure why people do appliances themselves. Worth getting a quote to see whether the saving is really there.

Remove the black handles – and stove from the bench – and this is sort of the look. Oh, and our bench will also run long ways.

Metro_32_CH_Kitchen_2 Metro_32_CH_KitDining